Showing posts with label Michelle. Show all posts

Tuesday, May 15, 2012

Beautiful and Delicious - Raw Carrot Cake Cupcakes!

Back in early April, I found myself in the midst of a week-long juice fast and yearning for its end. Just as I had read, the first few days of "withdrawal" (from hot foods, from foods that are crunchy or chewy, from whatever your food vices might be) are the absolute worst, but they get better. What doesn't ever wane, however, are the daydreams about what you will eat when you are on the other side of this commitment. I knew that I couldn't just jump right into a T-bone or tear open a bag of chips; it is strongly suggested that you ease your way back into solids, meats, dairy products, etc.

And eating raw isn't just good for juicing situations, it's good for you all the time. Did you know that your vegetables begin to lose their nutrients (you know, the reason you eat them in the first place) once they are heated above 118 degrees? Sure, wilted spinach with warm bacon vinaigrette is DIVINE, but so is a raw spinach salad with grated beets and strawberry slices!

I just so happened to time my fast for the week leading up to Easter so that I could celebrate the holiday with family without having to say "no thanks, I'm juicing" while everyone else made a b-line for the barbecue buffet at my husband's grandmother's home. I came across this recipe at just the right time. They're raw, so my system could easily digest them, and they looked mighty tasty. Plus, they have "kid-friendly" written all over them. 


So I gave the recipe a whirl. I have to admit, I was very nervous. I'm a sub-par baker, so you would think I would relish the opportunity to make cupcakes requiring no heat and minimal hand-mixing. But the lack of cook time threw me for a loop. However, I always love pulling out kitchen gadgets, so I was more than elated to be using my Cuisinart food processor to get these gems on a plate. (recipe adapted from blog.hailmerry.com) 

Raw, Vegan & Gluten-Free Carrot Cake 
  • 2 cups shredded organic carrots  
  • 1/2 cup dates - soaked for one hour then drained, pits removed (about 6 dates)   
  • 1/2 cup walnuts  
  • 1/3 cup dried apricots - soaked for one hour then drained  
  • 1/2 cup unsweetened shredded coconut  
  • 1/4 cup unsweetened raisins 1 teaspoon cinnamon  
  • 1/2 teaspoon nutmeg  
  • 1/4 teaspoon ginger  
  • 1 teaspoon vanilla extract  
  • 1 teaspoon orange zest 
 
1. Grate shredded coconuts in a food processor then remove to bowl and set aside.


2. Put dates, walnuts, apricots and raisins into food processor and blend until combined, but not a paste. Then add coconut, cinnamon, nutmeg, ginger, vanilla, and orange zest and continue to process until well-incorporated.


3. Add carrots back to processor and blend further, until the mixture comes together. 

4. Fill muffin tin cups 2/3 full of the mixture, pressing the tops flat. Chill then top with frosting (recipe below) 
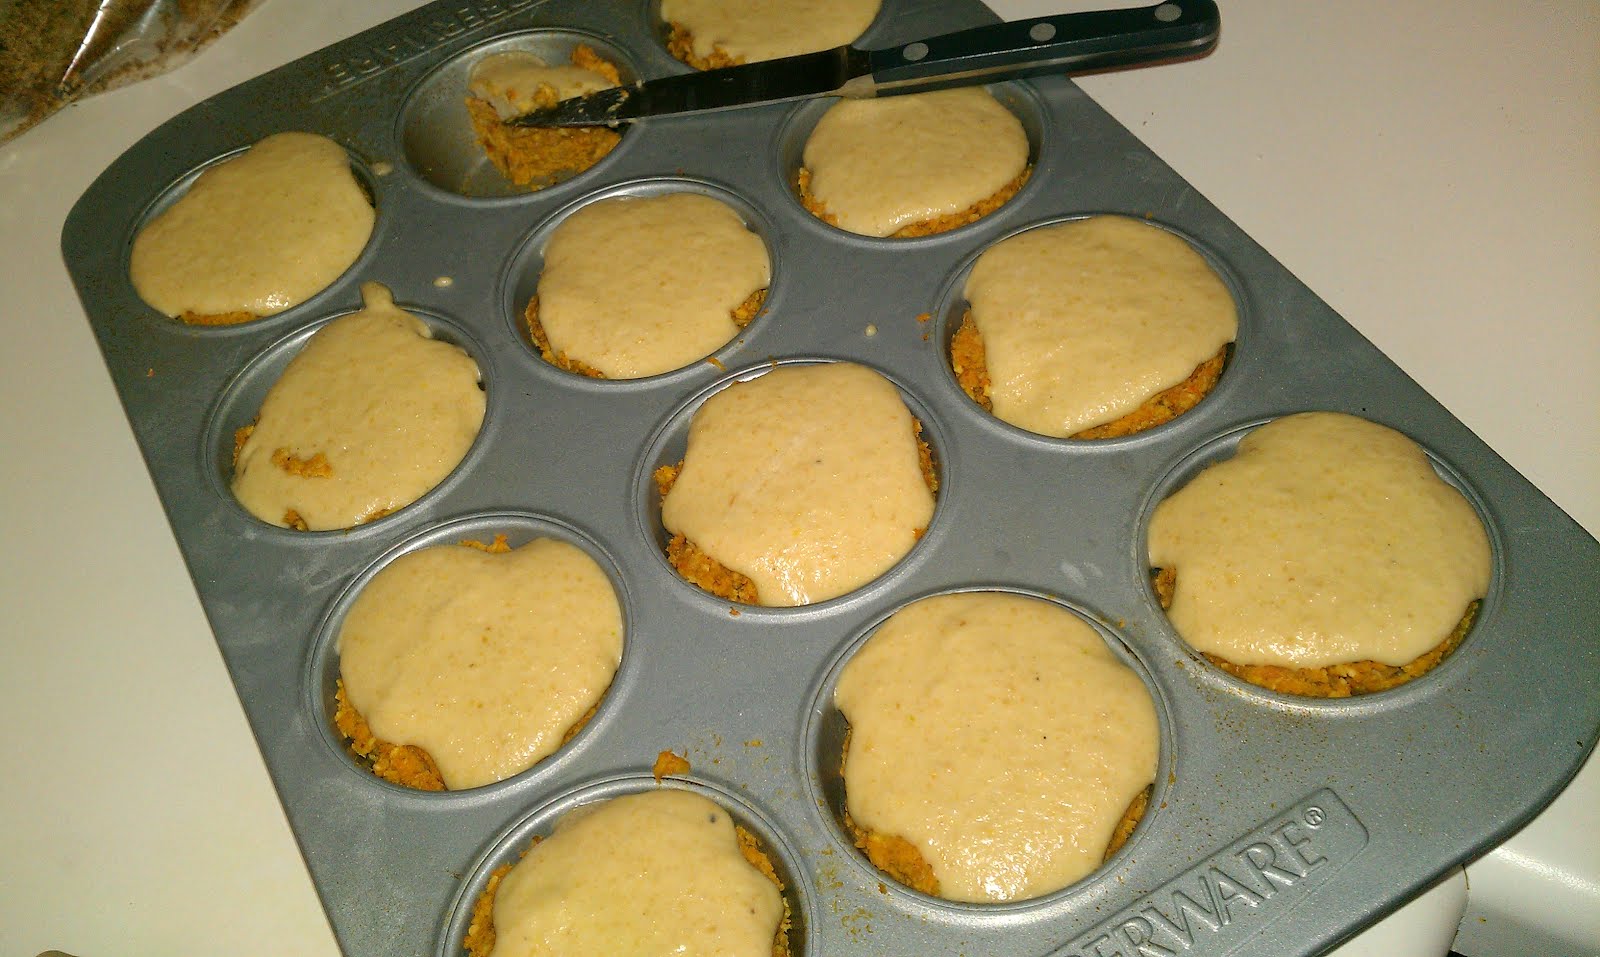


RAW Creamy Lemon Frosting 
  • ¾ cup cashews (soaked for 1 hour & drained)  
  • ¾ cup macadamia nuts  
  • ½ cup unsweetened organic coconut milk 
  • ½ cup 100% maple syrup  
  • 1 teaspoon fresh lemon zest 
  • 1 tablespoon vanilla extract 
  • ¼ teaspoon salt ½ cup organic unrefined virgin coconut oil, melted

Friday, May 11, 2012

Foodie Friday Meal Plan 5/14 - 5/20

Pizza! Burgers! Lasagna! What if I told you that you are going to indulge in these classic American (well, Italian-American in two cases) dishes this week and not feel even a tinge of guilt? They may be a little atypical in their preparation, but I guarantee they are tasty renditions of the favorites. In addition to those, you’ll find tons of delicious and healthy ideas for breakfast, dinner, and snacks! As usual, the recipes can be found here

DAY ONE:
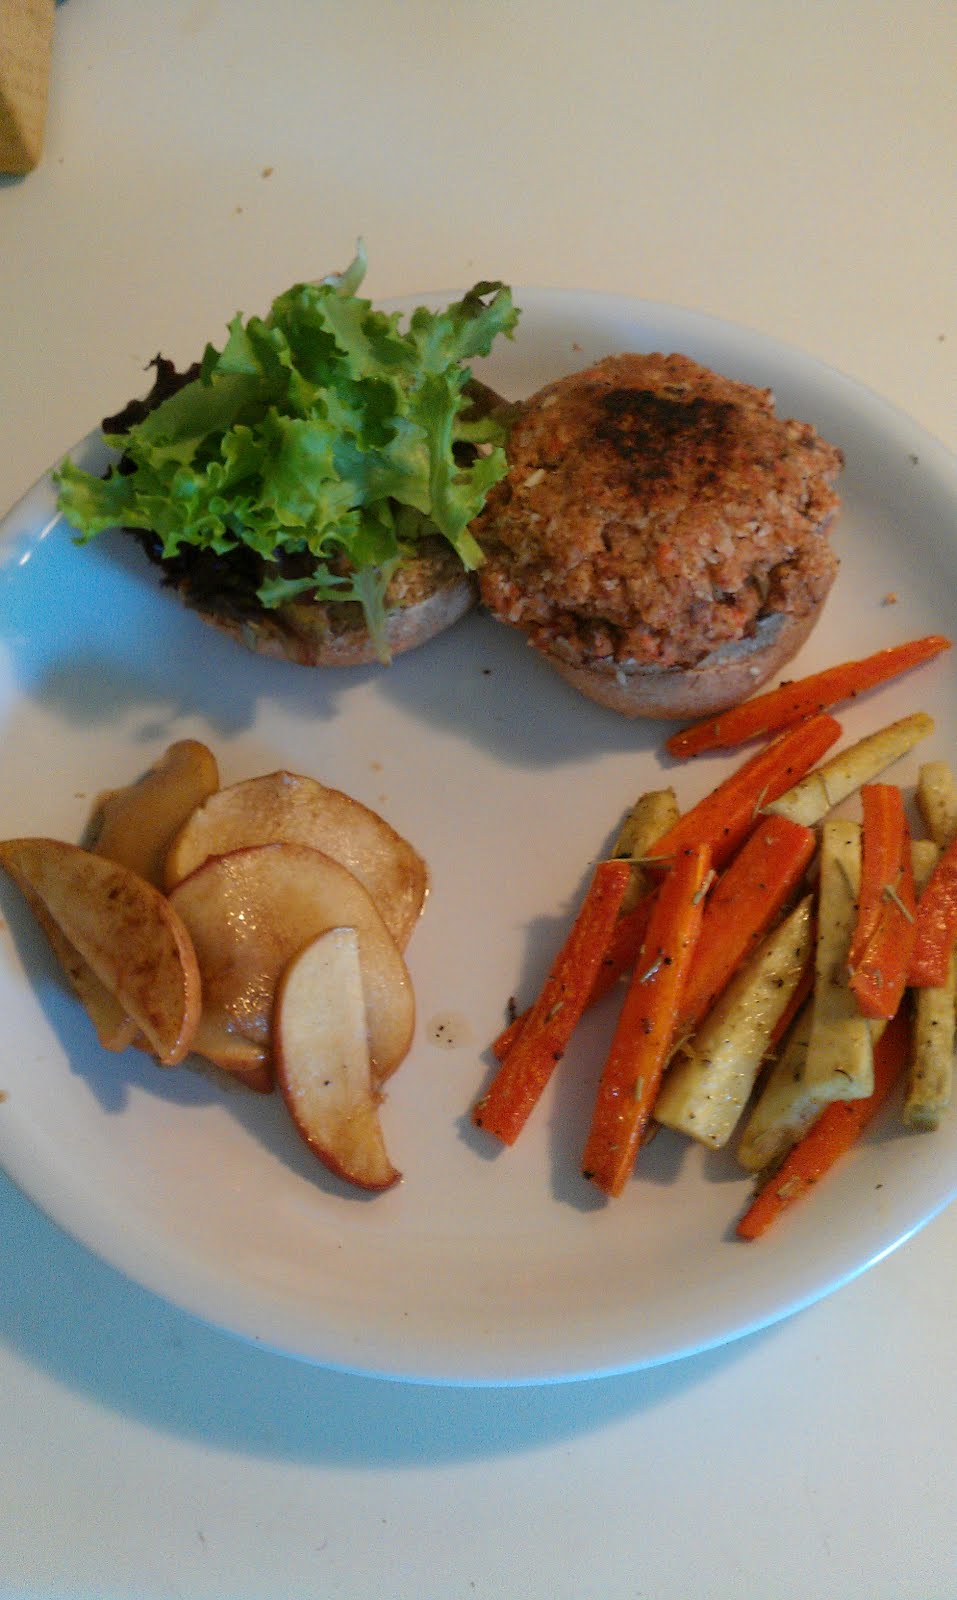
Asian Salmon Burgers 
Homemade Whole Wheat Hamburger Buns
Roasted Sweet Potato and Carrot “Fries” 
Cinnamon Apple Slices


DAY TWO:
Roasted Chicken with Leeks, Cress, and Radishes Garlicky Greens 
Whole Wheat Pasta with Beet and Carrot Puree Sauce
Roasted Garlic Tops

DAY THREE:
Tomato White Bean Soup with Pesto Cauliflower
Bread Pudding
Arugula Salad with Balsamic Vinegar


DAY FOUR:
Chicken Breast Valdostana (topped with a little marinara)
Braised Lentils with Spinach Purple Cauliflower Mash


DAY FIVE:
Whole Wheat Pizza Homemade Marinara Sauce
Fresh Ricotta (made by your own hands!)
Other toppings of your choice (get creative and be sure to add some greens)
Baby Greens Salad with Yellow Pear Tomatoes and Cucumbers


DAY SIX:
Pork Adovada
Homemade Refried Black Beans (cook black beans in slow cooker overnight with jalapenos and onion, puree once cooked, then throw in a pan with butter)
Quinoa Avocado Slices with Tomato Chunks


DAY SEVEN: 
Meatless Mexican Lasagna Topped with Sliced Jalapenos
Avocado Slices with Tomato Chunks
Baby Greens Salad


BREAKFASTS (both from The Organic Family Cookbook by Anni Daulter): Blueberry Love Muffins Surprising Baked Buttermilk Donuts


CULINARY CLASSES: Heart Shaped Pizzas for the Kids


Blueberry Love Muffins (see above) Strawberry Milk Sugar Free Strawberry Jam (I used the gelatin method from the pinned link and added a touch of maple syrup to sweeten it)


Enjoy!!!

Wednesday, May 9, 2012

EasyLunchboxes Review (and Giveaway!)

I first came upon EasyLunchboxes by following “100 Days of Real Food” on facebook. And while I was more than willing to take advice from Lisa of “Real Food,” I wasn’t about to remake my entire kitchen and pantry to match; I was neither financial able nor willing to just throw away all my plastic storage containers. Then along came all the reports about BPA and, suddenly, I found myself tossing out every canned food on my shelves and looking with disdain at the contents of my food storage cabinet. All I could think each time I opened that cabinet door was “danger!!!” So, I did my research while I also did some virtual window shopping on amazon.com. Ideally, I was looking for stainless bento-type containers to send with my husband and daughter to work and school, respectively. But goodness! I was not about to take out a second mortgage in the name of environmental and health consciousness! When I stumbled upon EasyLunchboxes again that day, it was a no-brainer. Four individual containers, each with a bright colorful lid and compartments for different meal components, and BPA free all for less than $15 - shipped!

I liked them from the moment I opened the package. The lids are easy to put on and take off, the boxes conveniently nest within each other (even the lids stack nicely on top of one another) and they were labeled dishwasher-safe. Out of nowhere, I just wanted to come up with cute and healthy meals to pack for my family. And, before I knew it, that’s just what I was doing every day (well, cuteness is in the eye of the beholder...I certainly think my lunches are at least cuter than they used to be). 

My youngest daughter testing the product durability.

I’m not exaggerating when I say that EasyLunchboxes go everywhere with me on an almost daily basis. I have a four-year-old who seems to be on an endless quest to burn off every single calorie she consumes, so she’s constantly running on empty, and a 15-month-old who can’t go more than an hour without some sort of snack since she is always trying to keep up with her older sister. And when the toddler doesn’t get what she wants, she lets everyone know - not so cute during library storytime. So, these boxes make my life easy by being a good fit in my lunch tote (although, since the lids are not leak-proof, the tote has to be carried flat on its side as opposed to by the handles) and very lightweight.

We all know that nasty brownish red hue that our plasticware tends to take on after being used for spaghetti sauce or similar foods. We all hate it, too. After I used my EasyLunchboxes to hold marinara, I fully expected to see that dingy color when I pulled it out of the dishwasher. To my delight there was nothing of the sort. They were as clear as the day I got them. I even stored diced beets in one of the boxes and still there was no discoloration after washing!


Whole wheat rotini with sauce, organic unsweetened applesauce, stove-popped popcorn, and a spinach/carrot brownie.

The most beneficial aspect of owning the EasyLunchboxes is that, upon their arrival, I automatically felt compelled to come up with healthy and delicious snacks and meals to pack in them. I no longer had to figure out what packaged foods would hold up to my daughter’s tendency to spin and throw her lunch bag around...I could simply throw together individual elements in these boxes. The compartments encourage me to provide my family with a variety of foods, not just wrap up a sandwich with an apple and call it a day. I’m now able to safely pack noodles with meatballs, carrots, and applesauce all in one lunch. I can quickly put together a good dinner for my husband when he works nights, as well. This makes the EasyLunchboxes a healthy choice all around.

Stove-popped popcorn, fresh berry skewers, leftover whole wheat pasta with carrot/beet puree sauce, and a pumpkin cream cheese egg roll for my daughter.


In the past few weeks, I’ve begun to see more and more of them around town - at the park and my daughter’s gymnastics class. Obviously, people are having the same positive experience with EasyLunchboxes as I have had. I love seeing them popping up everywhere as these were created by a concerned mom who saw a need and came up with a solution. Kelly Lester, EasyLunchboxes’ owner and creator, aimed to make something that could hold enough to satisfy an adult hunger but lightweight and easy for a young child. Good on her for having the gumption to get it done!

Now is your chance to feed your family with less waste and more creativity...FREE! Enter our giveaway starting May 10 to win a set of four EasyLunchboxes PLUS one lunch tote in the color of your choice (a $21.90 retail value)!!

This giveaway is open to US residents only!

a Rafflecopter giveaway

Tuesday, May 8, 2012

How to Save - Personal Care Products

I’m calling this particular blog entry “How to Save,” which I’m sure led you to intinctively think “money”. However, that’s only one aspect of your life that you’ll find you’ll be able to cut back with these tips and recipes. You’re also going to be saving time, saving fuel, saving your health, and saving the planet. Obviously, making your own personal care products saves you money in one big way - you don’t have to buy the store shelf version of the item. However, when you start to think about it, you realize you’re also saving time at the store and having to go to the store less often which, in turn, saves fuel and fuel costs. Additionally, you can control what goes into your products. So, you’re not exposing yourself to parabens (http://healthimpactnews.com/2012/99-percent-of-breast-cancer-tissues-have-parabens-from-cosmetics/) and potentially hazardous chemicals (http://www.rodale.com/hormone-disrupting-chemicals?cm_mmc=TheDailyFixNL-_-868210-_-04022012-_-what_is_a_hormone_disruptor_anyway_text), thereby protecting your health. Finally, you’re not using and tossing packaging, you’re reusing what you’ve got on hand or, ideally, using a glass or stainless container that can easily be rinsed and used again.

While there are a TON of different recipes for different DIY cosmetics and other personal care items, these are a few that I’ve tried and love. The bonus is that these are things I use every day, sometimes two or three times a day, meaning that I’m really cutting back in all the areas mentioned above!

Eye Makeup Remover

As crunchy as I tend to be, I still love my heels and my makeup. I’ve been trying to wear less and less cosmetics since there are certainly chemicals and plasticizers present in my foundation and eyeliner, but to completely go cold turkey just isn’t in my future (particularly since I haven’t found the secret to reversing or freezing time and aging). I decided to, instead, ditch my Maybelline Eye Makeup Remover which I use at least four times a week. In the process, I found myself not having to use my toner, either - BONUS!

All you’ll need is water (practically free), vegetable glycerin (less than $10 per bottle and you’ll only need a smidgen per recipe), and oil (you can use coconut, almond, vitamin E, olive, avocado, baby oil...whichever you choose or happen to have on hand). I used an 8-ounce bottle I originally purchased for taking toiletries with me on vacation. It’s got a squirt spout, which is perfect for applying the remover to a cotton swab and swiping your face!

Here’s the recipe...just put all the ingredients into your chosen container, then swish around a bit and there you go!

1 ½ tablespoons vegetable glycerin
¾ tablespoon oil
approximately ⅔ cup water

Voila! All in all, the solution costs about $1 for an 8-ounce bottle of remover, whereas I was previously paying $5 for a 3-ounce bottle. It doesn’t seem like a whole lot of savings, but everything adds up!

Deodorant
Don’t be scared. I know everyone hates sweating and no one wants a deodorant which isn’t going to be able to stand up to heat and activity. I live in Texas where it got so hot last summer that our state was literally on fire. So, believe me when I tell you this stuff works!

The next time you run out of deodorant, don’t toss the container! Simply follow this recipe (adapted from littlehouseinthesuburbs.com), then press the mix into the container. Within minutes, you’ve got a smooth and effective perspiration-fighter!

¼ cup baking soda
¼ cup cornstarch
10 drops of your favorite essential oil (I used tea tree but I think next time I’ll try rosemary - love the smell)
2-3 tablespoons coconut oil

Mix the first three ingredients in a bowl until well-combined, then stir in the coconut oil, adding more a little bit at a time until you reach the right consistency for you. Remember that coconut oil is solid at room temperature, but starts to melt above 72 or so...be sure to store this somewhere that stays relatively cool. Also, word to the wise: this must be applied by hand. I’m okay with that, especially since a little bit goes a long way. I made this recipe about two months ago and I’m still only halfway through mine.

Mouthwash

Have you ever taken a minute to think about all the stuff you put in your mouth throughout the day? I’m sure you take steps to clean up your diet, so the food you eat is (hopefully) organic and chemical-free. But what about your oral care products? I didn’t really give it much thought until I realized that the ingredients label on my mouthwash is not required by law to be all-inclusive. And what the manufacturers choose to list there is enough to give me great pause. So, the last time I ran out, I decided to try my hand at DIY whitening mouthwash. I remember my mom using hydrogen peroxide as a teeth whitener when I was a kid; it was time I tried something myself.

I chose to use an empty mouthwash container, but as soon as I buy more small mason jars, I will switch to using one of those. I don’t expose the plastic container to heat (I simply rinse out with lukewarm water when I’m out), so I’m not terribly afraid of the consequences, but I’d still like to un-plastic my life as much as possible.

It’s a simple recipe, really. And one you can easily adapt to your own tastes. I use a mixture of ¼ hydrogen peroxide to ¾ water (filtered is best), then I add drops of peppermint extract until it tastes perfectly minty and fresh. I use this twice a day and I’ve noticed that my teeth look great and my mouth feels delightfully clean!

Friday, April 27, 2012

Foodie Friday: Meal Plan 4/30-5/6

I’m an avid foodie and I love (live) to cook. It relaxes me, it gives me a feeling of accomplishment, it tames my anxiety by giving me something to do with my hands, and it gives me great comfort to know that the food I set on the table came from the freshest ingredients possible and was brought together by my hands and no one else’s. So, I suppose in that way it also satisfies my inner control freak (sometimes not so inner, but I digress).

I’m also a food porn junkie - I love to look at pictures of gorgeous meals and I also love to produce my own food porn, though the results tend to be less-than-stellar looking (I blame my camera phone, but to be honest, I’m not much of a food artist). Almost every night, I post pictures of my dinners for all the world (well, all of a certain facebook group, at least) to see. I’m both documenting my achievements and proving to others that healthy, well-cooked meals are within anyone’s reach.

As a result of all my food porn spamming, I get a lot of positive feedback and many requests for recipes and meal plans so that other people can put together a cache of their own go-to meals. That is what this is all about - sharing information, recipes, tips, ideas, etc. Each week I will post seven days worth of dinners (three of which will be meatless, a compromise borne of much arduous discussion with the husband), as well as ideas for “cooking class creations” to do with young children each night and a few freezable breakfast and snack ideas so that you can have a stash of things to reheat in a pinch.

Here goes nothing...for recipes, please visit my pin board “Meal Plan 4/30-5/6” here http://pinterest.com/mlg5678/meal-plan-4-30-5-6/ . If you have questions about substituting a particular ingredient because you can’t find or don’t have something listed in a recipe, don’t hesitate to contact me at greenolagirls@gmail.com!

DAY ONE:
Spaghetti Squash “Noodles” with Thai Peanut Sauce (I added sriracha to both of these sauces)
Baked Vegetable Egg Rolls
Egg Roll Dipping Sauce


DAY TWO:
Braised Oxtail in the Slow Cooker
Roasted Cauliflower with Bacon and Garlic
Sorrel Salad with Beets and Berries


DAY THREE:
Spaghetti Squash Florentine (I used a combo of kale and spinach in the florentine, skipped the jarred sauce and just pureed some fresh organic roma tomatoes)
Cauliflower Crust “Pizza” Topped with Broccoli Pesto and Grated Parmesan
Mixed Baby Greens Salad Topped with Halved Yellow Pear Tomatoes and a Drizzle of Balsamic Vinegar


DAY FOUR:
Salmon with Blood Orange Salad (I added sliced radishes to the salad)
Quinoa with Blood Orange and Basil (I used whole wheat couscous in place of quinoa since I had run out...it also makes the recipe much quicker to make)


DAY FIVE:
Vegetarian Quinoa Chili in the Slow Cooker
Summer Corn Cakes
Honey Mustard Collard Greens

DAY SIX:
Lazy Woman’s Cabbage Roll Casserole (using ground chicken thighs)
Chickpeas and Spinach
Mixed Baby Greens Salad Topped with Halved Yellow Pear Tomatoes and a Drizzle of Balsamic Vinegar


DAY SEVEN:
Sweet Potato Veggie Burgers (using black beans)
Homemade Whole Wheat Hamburger Buns
Raw Cauliflower Mash (skipped the mushroom gravy)
Mixed Baby Greens Salad


Each week, I pick a day on the weekend when the husband is able to baby wrangle and I make several different easy, freezable recipes. These morsels will then get reheated in the mornings for breakfast or a snack or even to be included in my oldest daughter’s lunch when she goes to her gymnastics MDO program twice a week. This week, I made these tasty treats:
Pumpkin Pistachio Bread
Whole Wheat Waffles (I mix in superfoods like chia or flax seeds, a cup of either kefir or Odwalla superfood smoothie, or pumpkin puree)
Blueberry Quinoa Pancakes

Also, each night, I try to do a little interactive cooking demonstration with my oldest daughter. She loves to be treated with dessert each night, and I feel a bit better knowing that she’s taken part in the preparation and that the ingredients are wholesome. Her kitchen lessons this week have included:
Healthy Chocolate Pudding (6-8 soaked and pitted medjool dates, 2 T cocoa or cacao powder, ½ cup coconut milk, 1 t vanilla extract, 1 ripe avocado - throw it all into a blender or processor until smooth)
Stove-popped Popcorn (we made “cheesy” using butter, sea salt and grated Parmesan, and we made “sweety” using butter, honey, cinnamon and vanilla extract)
Easy Chocolate Frosting
Yogurt Covered Strawberries
Yogurt Freezie Pops (we simply pureed fresh berries, mixed them in with yogurt, then poured the mixture into these pop molds http://www.amazon.com/Norpro-431-4-Piece-Silicone-Maker/dp/B0036B9KHO/ref=sr_1_1?ie=UTF8&qid=1335456424&sr=8-1 and froze them)
Ice Cream in a Baggie (we used heavy cream sweetened with vanilla and maple syrup)